Ray Wilson authored this content while he was actively running MFOS as the founder and resident genius.
We retain the content because it reflects a valuable point of view representing that time and place.
Article by Ray Wilson
IntroductionThe Swiss OpAmp Knife is for when you have an idea that requires some op amps and associated components and you want a quick PC board to accomodate the circuitry and you can't stand the thought of putting one of those phenolic single sided pieces of junk into your hand-crafted synth. I love this PC Board and putting together quick glue circuits has never been quicker or more convenient. This product is definitely for you more seasoned hobbyists who already have ideas for op amp circuits and just need a quality place to put them without having to etch a board or use a low quality single sided phenolic kludge board. |

|

|
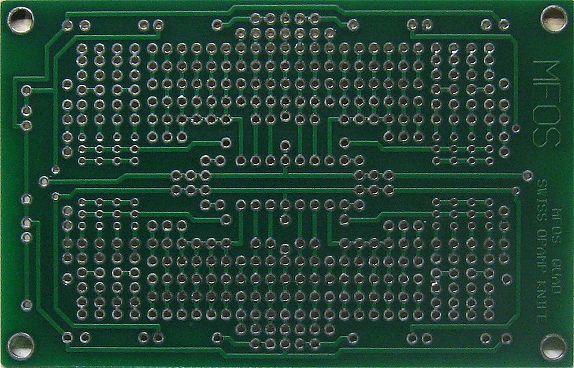
Swiss OpAmp Knife PC Board Details
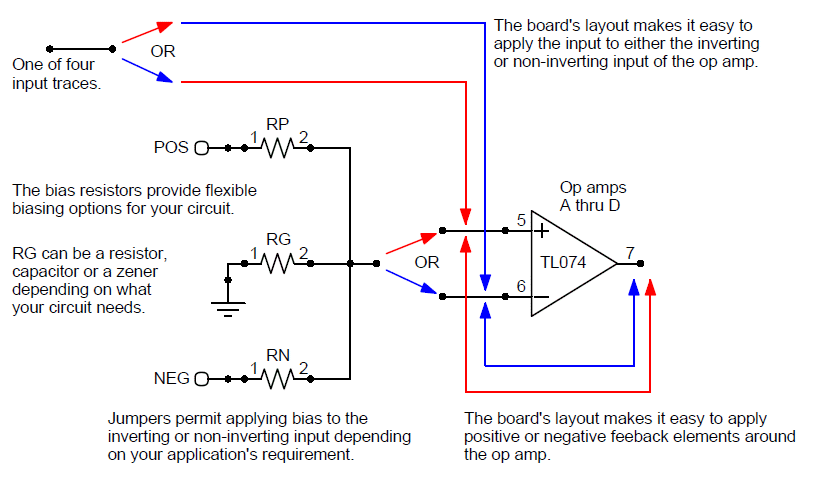
The Swiss OpAmp Knife accomodates a TL074CN quad op amp or any op amp whose pinout matches the TL074CN. It makes creating op amp based circuits quick and easy. Each of the four op amps has the same compliment of pads. The quad op amp package is bypassed with both .1uF caps right at the power pins and 10uF electrolytics where the power comes into the board. There are four input pad areas which can be routed to either the inverting or the non-inverting input via jumper. There are several floating pads. There are pads for the inverting and non-inverting inputs that align with the output of the op amp. This makes adding positive or negative feedback elements very convenient. There are pads that connect to ground, POS and NEG in case your circuit needs them. There are pads to accomodate biasing resistors. You can apply bias from any or all of the pads. Since you can use a two resistor voltage divider between POS and NEG to get any voltage in between the RG (resistor to ground) pads can be used for a voltage stabilization cap. In other circumstances you may prefer to bias using just RP and RG or just RN and RG. The inverting inputs are marked with the "-" symbols and the non-inverting inputs are marked with the "+" symbols.

Here is a schematic representation of each op amps optional connections. Inputs can be routed to either the inverting or non-inverting input of each op amp. Bias can be routed to either the inverting or non-inverting input of each op amp. There are plenty of pads to accomodate feedback elements.
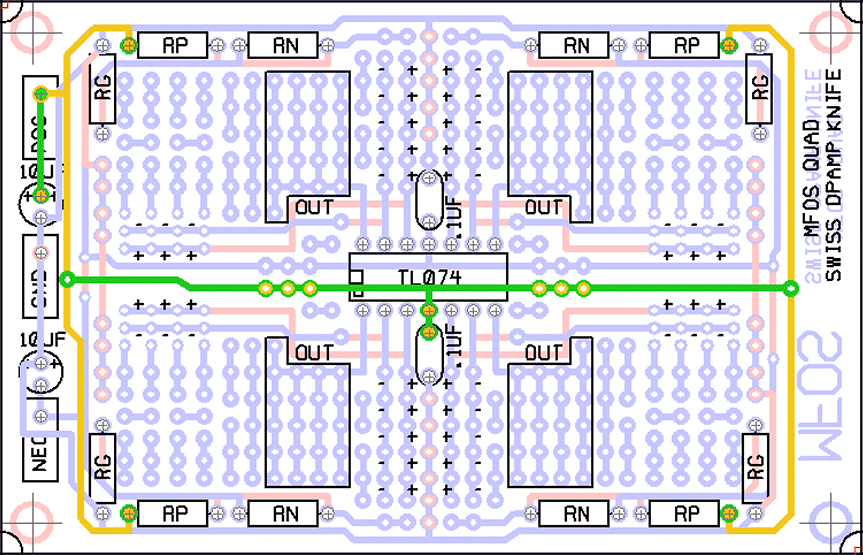
Swiss OpAmp Knife Top And Bottom Traces View
Here is a view of the traces and pads showing the top (pink) traces and the bottom (blue) traces. By studying this layout ccarefully you will avoid mis-wiring your circuit.

Swiss OpAmp Knife Ground Traces Highlighted
This image highlights the ground traces and pads on the board.

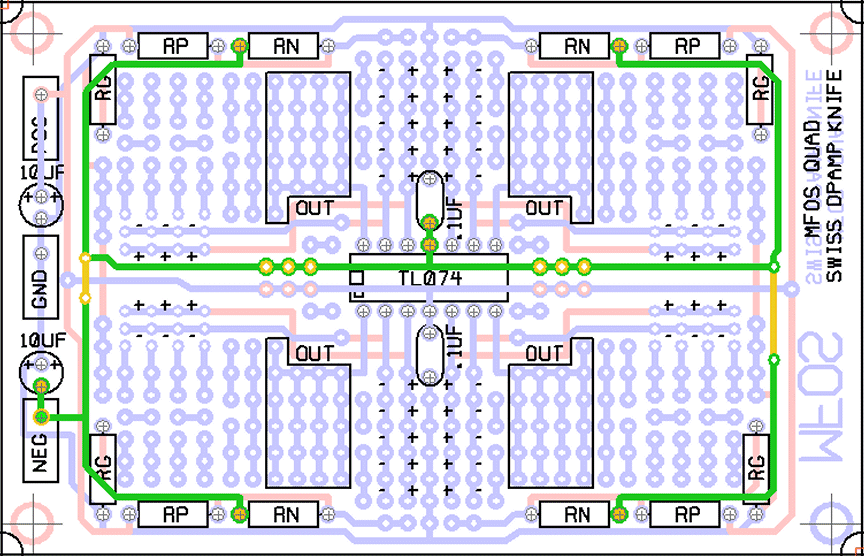
Swiss OpAmp Knife Positive Supply Traces Highlighted
This image highlights the positive supply traces and pads on the board.
Swiss OpAmp Knife Negative Supply Traces Highlighted
This image highlights the negative supply traces and pads on the board.
Swiss OpAmp Knife PC Board Top Side Larger Image
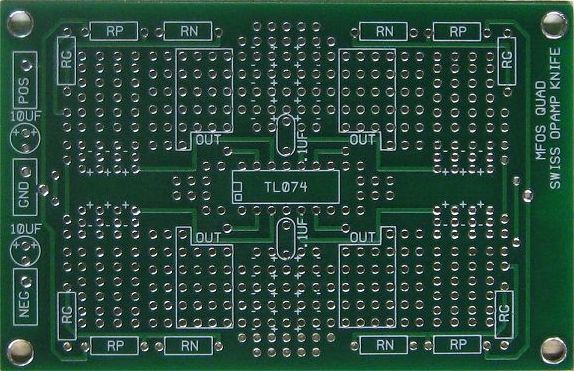
Swiss OpAmp Knife PC Board Bottom Side Larger Image
Swiss OpAmp Knife PCB Artwork PDFs
Adobe PDF Reader will print this X1 artwork correctly if set to print "Actual Size"" with no scaling.
Top Copper (As viewed from top of board)
Bottom Copper (As viewed from top of board) For contact printing you need to "mirror" this image.
Silk Screen (As viewed from top of board)
Swiss OpAmp Knife Project Layout Template
When you want to make a project using the Swiss Op Amp Knife use this template with your drawing program to lay out the components. If your drawing program allows you to use layers then make this the background and add a layer on top of it to add your component outlines. You have my permission to reprint this diagram when you are sharing circuits based on the Swiss Op Amp Knife.
